Matching RVAltCtrl to your RV model
Matching RVAltCtrl to your RV model tells it how to talk to your RV's systems, lights, climate, tanks, and everything else the device controls. This is a one-time step: once it's set, you won't need to come back to this page again.
Video Walkthrough
Prefer to watch instead? Here's a video of the whole setup process.
Brief Overview
The RVAltCtrl Portal at my.RVAltCtrl.com is the easiest way to reach RVAltCtrl, whether you're connecting locally or remotely. Open it and connect to your device to complete these steps. If RVAltCtrl isn't on your network yet and you're still connected directly to it in Access Point mode (RVAltCtrl's own WiFi network, rather than your RV's), open a browser and go to http://RVAltCtrl.local or http://192.168.4.1 instead.
- On RVAltCtrl's Home page, if a model isn't set up yet, tap Go to RV Model, or get there at any time from Settings → RV Model.
- Tap the Select your RV model dropdown and choose the model that matches your RV.
- For CZone-equipped RVs, choose the CZone option and let auto-detect fill in the rest, that's the best choice for almost everyone with a CZone system.
- Press Save to Device. RVAltCtrl reboots automatically, a quick process that takes about 10 seconds, to apply your RV model.
See below for the full walkthrough, with screenshots.
RV Model Not Set Up
Until you've picked a model, RVAltCtrl's Home page shows a reminder that this step isn't done yet, a card titled RV Model Not Set Up, with a shortcut button straight to the page where you set it.
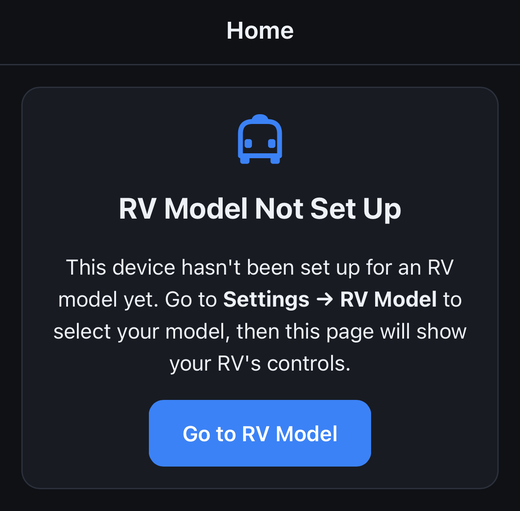
Tap Go to RV Model to jump there directly, or get to the same page from Settings → RV Model.
Selecting your RV model
On the RV Model page, tap the Select your RV model dropdown.
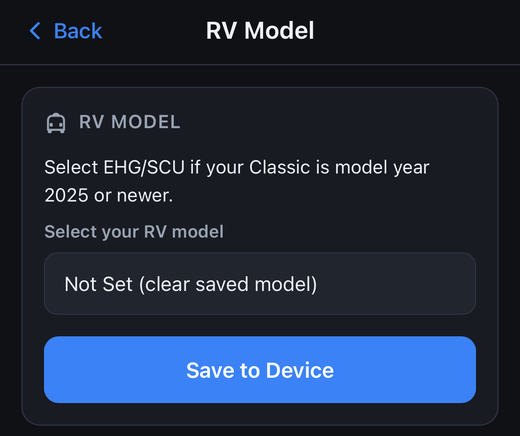
That opens a list of every RV model RVAltCtrl supports. Pick the one that matches yours.
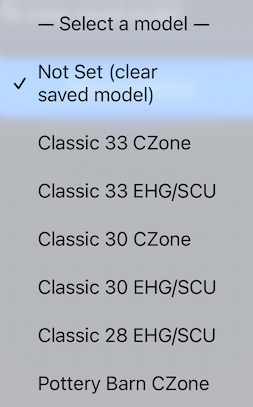
Which one that is comes down to your RV's model year: earlier model years use CZone, and 2025 and later model years switch to EHG/SCU. Classic 28 only ever shipped as EHG/SCU, so it has no CZone entry at all. Pottery Barn only ever shipped with CZone, so it has no EHG/SCU entry.
CZone
For CZone-equipped RVs (Classic 33 and Classic 30 through model year 2024, all Pottery Barns), choose the CZone option for your model. That reveals two ways to finish setup, Option 1 and Option 2 below the model selector.
Option 1: Read Config from Network is the auto-detect path, and the best choice for almost everyone with a CZone system. Press the Read Config from Network button and RVAltCtrl queries your RV's CZone network directly and fills in the CZone Type and Configuration Name dropdowns for you.
Option 2: Manually select your configuration is there for when auto-detect doesn't find your setup, or you'd rather set it yourself. Pick your CZone Type (a 5 inch touchscreen is a Touch 5, 7 inch is a Touch 7), then pick your Configuration Name from the dropdown below it. You'll find your configuration name on your CZone touchscreen itself: tap the menu in the upper right, then Settings → About → Configuration.
Either way, once a configuration is selected you'll see further dropdowns below it auto-filled in for you; you can also populate them by hand if you ever need to override what was found.
EHG/SCU
For EHG/SCU-equipped RVs (model year 2025 and later), the only selection to make is the matching entry itself: Classic 33 EHG/SCU, Classic 30 EHG/SCU, or Classic 28 EHG/SCU. There's no CZone Type or Configuration Name to pick, and no auto-detect step, since EHG/SCU has nothing further to configure. Once you've picked the right one, you're done.
Once you've made your selections, press Save to Device. RVAltCtrl will automatically reboot, a quick process that takes about 10 seconds, to apply your RV model. That's it, this page won't have to be used again.